Friday, October 18, 2013

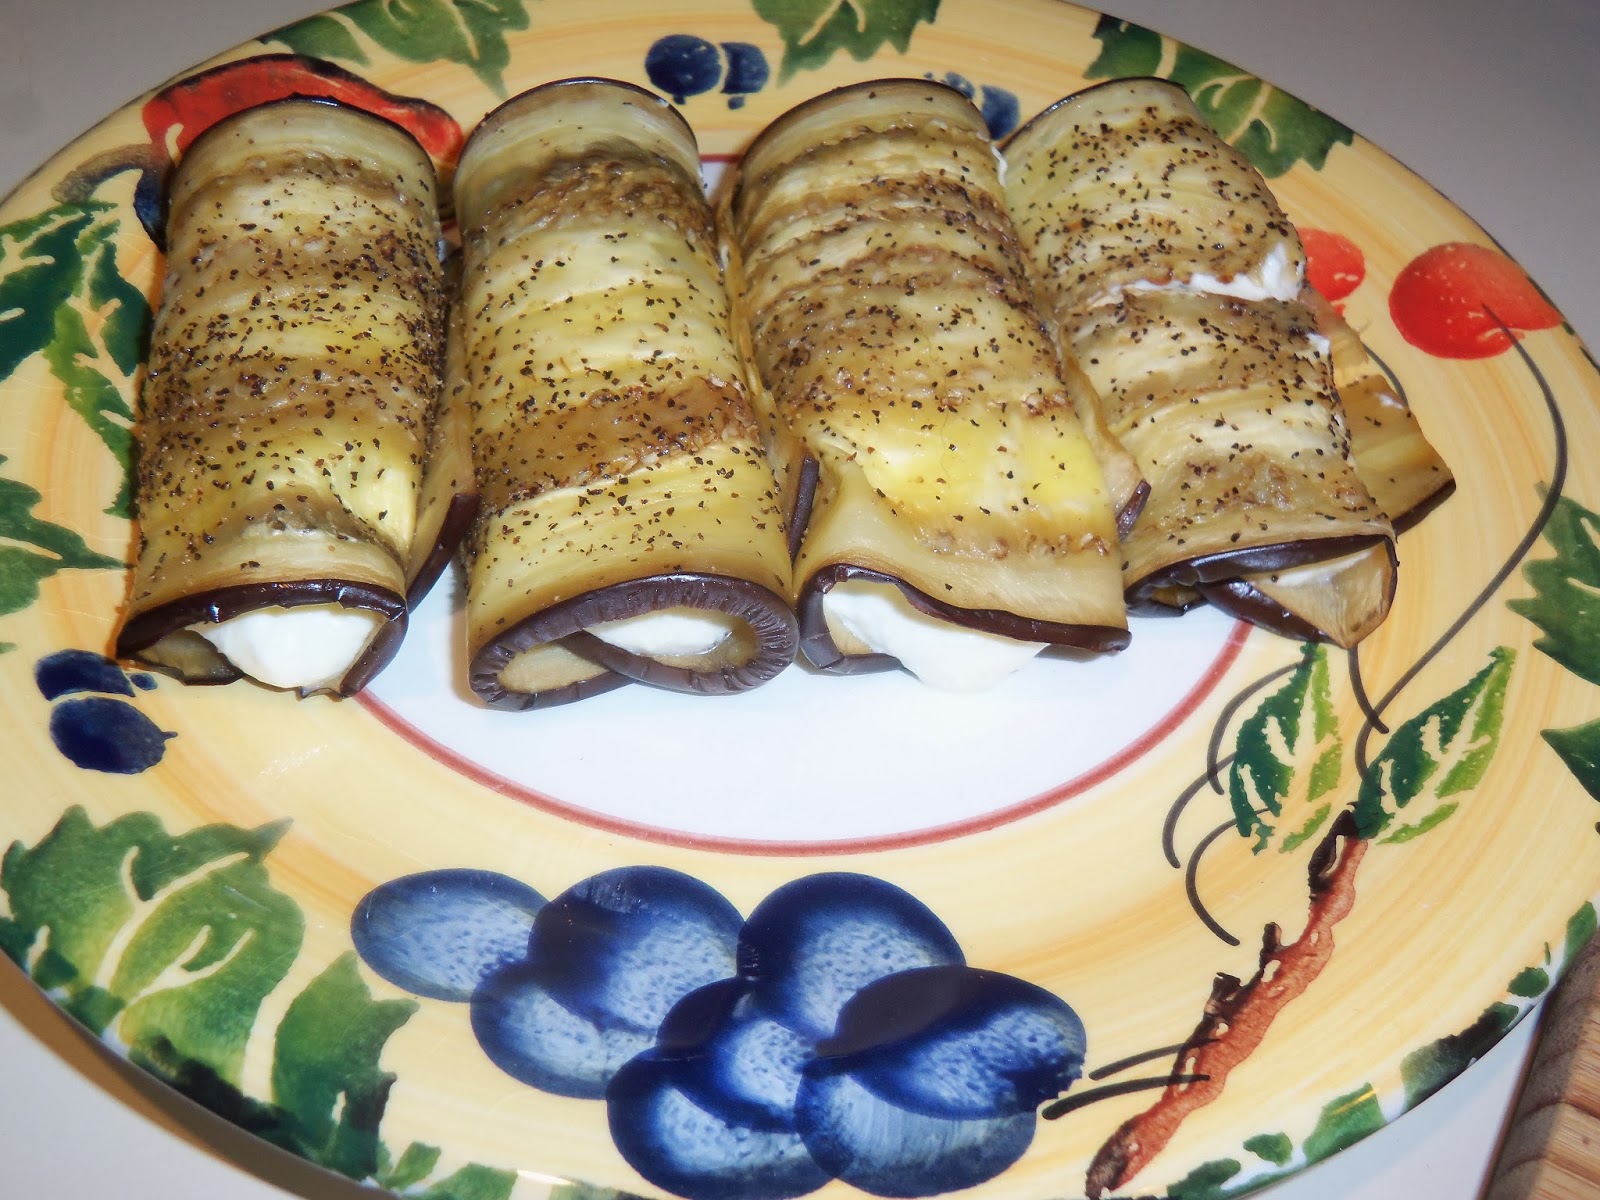
Lemony Eggplant Rollatini

I know it's been a long time since I've written anything.  After my accident I found it hard to get back into the swing of things at home.  But I'm back and I have a lot of creative dishes to share with you.  The Husband has gone back to eating some meats so I may even through in a recipe for pork chops or steak every once in a while!  My first dish I want to share with you is a yummy Rollatini dish.  It's surprisingly easy to make and delicious to eat!

 I started with:
2 Medium Eggplants
2-4 Minced Cloves Garlic
1 Diced Medium Onion
6 Skinned and Chopped Plum Tomatoes (like I did here)
1 1/2 Cups Ricotta Cheese (preferably Homemade!)
Zest from 1 Lemon
1/2 Cup Parmesan Cheese
3 Tbsp Chopped Basil

Start by carefully slicing the eggplant into 1/2 inch strips.  You can peal them before hand to help reduce some bitterness from the skins, but I didn't bother today.  Lightly coat each slice with olive oil, salt and pepper and bake at 375 for about 10-15 minutes.  Turning over half way.
Meanwhile, heat a Tablespoon of oil in a pan and add the garlic. 

Once the garlic begins to cook and become fragrant, add the onion and saute until it starts to turn translucent.
Make sure not to let the garlic burn!

Add the tomatoes
 While the tomatoes reduce you can begin making the filling for your rollatini!  Add the Ricotta and Parmesan cheeses to a bowl with 2 tablespoons basil and the lemon zest.   Mix thoroughly and add salt and pepper to taste.  You may want to add the lemon zest in small additions until you feel it has the flavor you're looking for!

 Once the eggplant is soft, you can start filling it.

Add about 2 tablespoons of the cheese mixture to each slice of eggplant.  Begin rolling from the filled side upward to create the Rollatini shape.

Place on a plate, seam down so they don't unroll.
 Once the tomatoes have softened and their juice has reduced, add the left over tablespoon of basil to the sauce. 

 Top the rollatini with sauce and some fresh Parmesan cheese and enjoy with a side salad.
 Instead of assembling the left overs I decided to create a casserole of them.  I added a layer of cheese to the bottom of my Pyrex dish followed by a layer of diced eggplant and another layer of cheese.  I finished it off with the last of the sauce. 

It made for a great lunch the next day!

Monday, July 29, 2013

Greek Salmon with Tomato-Feta Sauce and Grilled Zucchini

It's been a ruff week.  Sunday the 21st I fell hiking and ended up with 36 stitches in my knee.  I'm thankful that nothing was broken and no tendons or ligaments were torn.  I'm very very lucky!  I'm also thankful that I had some pictures of meals I had made that I hadn't blogged about.  So here is an amazing Greek-Style Salmon dish I had made before I fell.  Enjoy!

Ingredients for 2:
1lb Wild Caught Salmon
2 Cloves Garlic
4 Plum Tomatoes
2 Tbsp Dill
1/2 container Feta
1 Lemon
2 Zucchini
2 Tbsp Olive Oil
Salt and Pepper to taste
Cedar Plank for grilling

Peal the skins off the tomatoes and then chop them.  Chop the garlic and slice the Zucchini and lemons.  Preheat the grill.

Add the tomatoes to a pan with 1 Tbsp dill and the juice from one slice of lemon.  Let reduce on low to medium while you cook the rest of the food.  Keep an eye on it and remove from heat if it's getting too thick. 


Add the remaining olive oil to the zucchini and toss.  Add the zucchini to the grill and sprinkle with salt and pepper. Place the Salmon on the cedar plank and squeeze the remaining lemons on top.  Spread the garlic and the remaining dill over the Salmon and place the plank on the grill.  Keep a spray bottle filled with water handy in case the plank catches fire. Flip the zucchini once they start to get grill lines and sprinkle with more salt and pepper.  If you've never grilled with wood planks before, be sure to read the directions first.  You're supposed to soak them in water for a few hours so you'll need to prepare ahead.  I was experimenting with this plank.  I had soaked it a few days before I made this recipe and then placed it in a bag in the freezer.  This way I could have cedar planked fish without thinking ahead 3 or 4 hours!

Add the Feta cheese to the tomatoes and pour over salmon.  This dish was fantastic!  Just writing about it makes my mouth water!  I think I need to make it again soon!

Monday, July 15, 2013

Quick Meal - Shrimp, Spinach and Tomato Bowl

Hi!! I know it's been a while, but July has been a crazy month so far!  Every day has been busy and I haven't had much time in the kitchen.  The few times I have cooked have been very quick meals, which I will show you.  Just because you're swamped with plans doesn't mean you can't cook a good meal!  I had about 10 minutes in the house before I had to run out again and I was famished!  The only things we really had were shrimp, spinach and tomatoes so I quickly racked my brain for what I could do.  This meal was great because it could be so versatile, but it could also be very simple and eaten alone.  

 I started with:
About 9 Shrimp per person
1/2 cup of Spinach per person
1 Tomato per person

Add some olive oil to a pan and heat over medium.  Add the shrimp and cook until almost completely pink.  Add some salt and pepper.


Add the spinach to the pan and cook down.


While the spinach cooks, cut the tomatoes into 1 inch chunks and add to the pan.  I added a bit more salt and pepper and threw in about 2 teaspoons of chili powder.  It was a last minute addition that really made the dish pop!


I grated some parmesan cheese on top and devoured the whole thing in record time!  This would be great over pasta or in a wrap, but it was still very filling on it's own!  It kept me going until I was able to get home again at 11pm!  If summer days are longer, why do they feel so short?!


Tuesday, June 25, 2013

Tilapia with Spinach and Faux-Risotto

I really love the way a well made risotto compliments a meal, but it's a bit too much carbs for me.  I'm not a huge fan of carbs because they're my weakness!  I'd rather stay away because one small portion of white rice will turn into eating an entire pot!  I can't control it!  I was so happy to stubble across this recipe while at a friends house.  We wanted to make mashed "faux-tatoes" and didn't have a food processor so we used a potato masher instead.  The result was somewhat like risotto.  I quickly took note of what we used and decided I needed to share with all of you.  So here goes... Tilapia with Spinach and Faux-Risotto

 1 Head Cauliflower
2 or more Cloves Garlic
1 tsp Butter
1 Cup Finely shredded Parmesan Cheese
2 Tilapia Filets
About 1/2 Cup Flour
Juice from 1 Lemon
6 oz Spinach
Salt and Pepper to taste

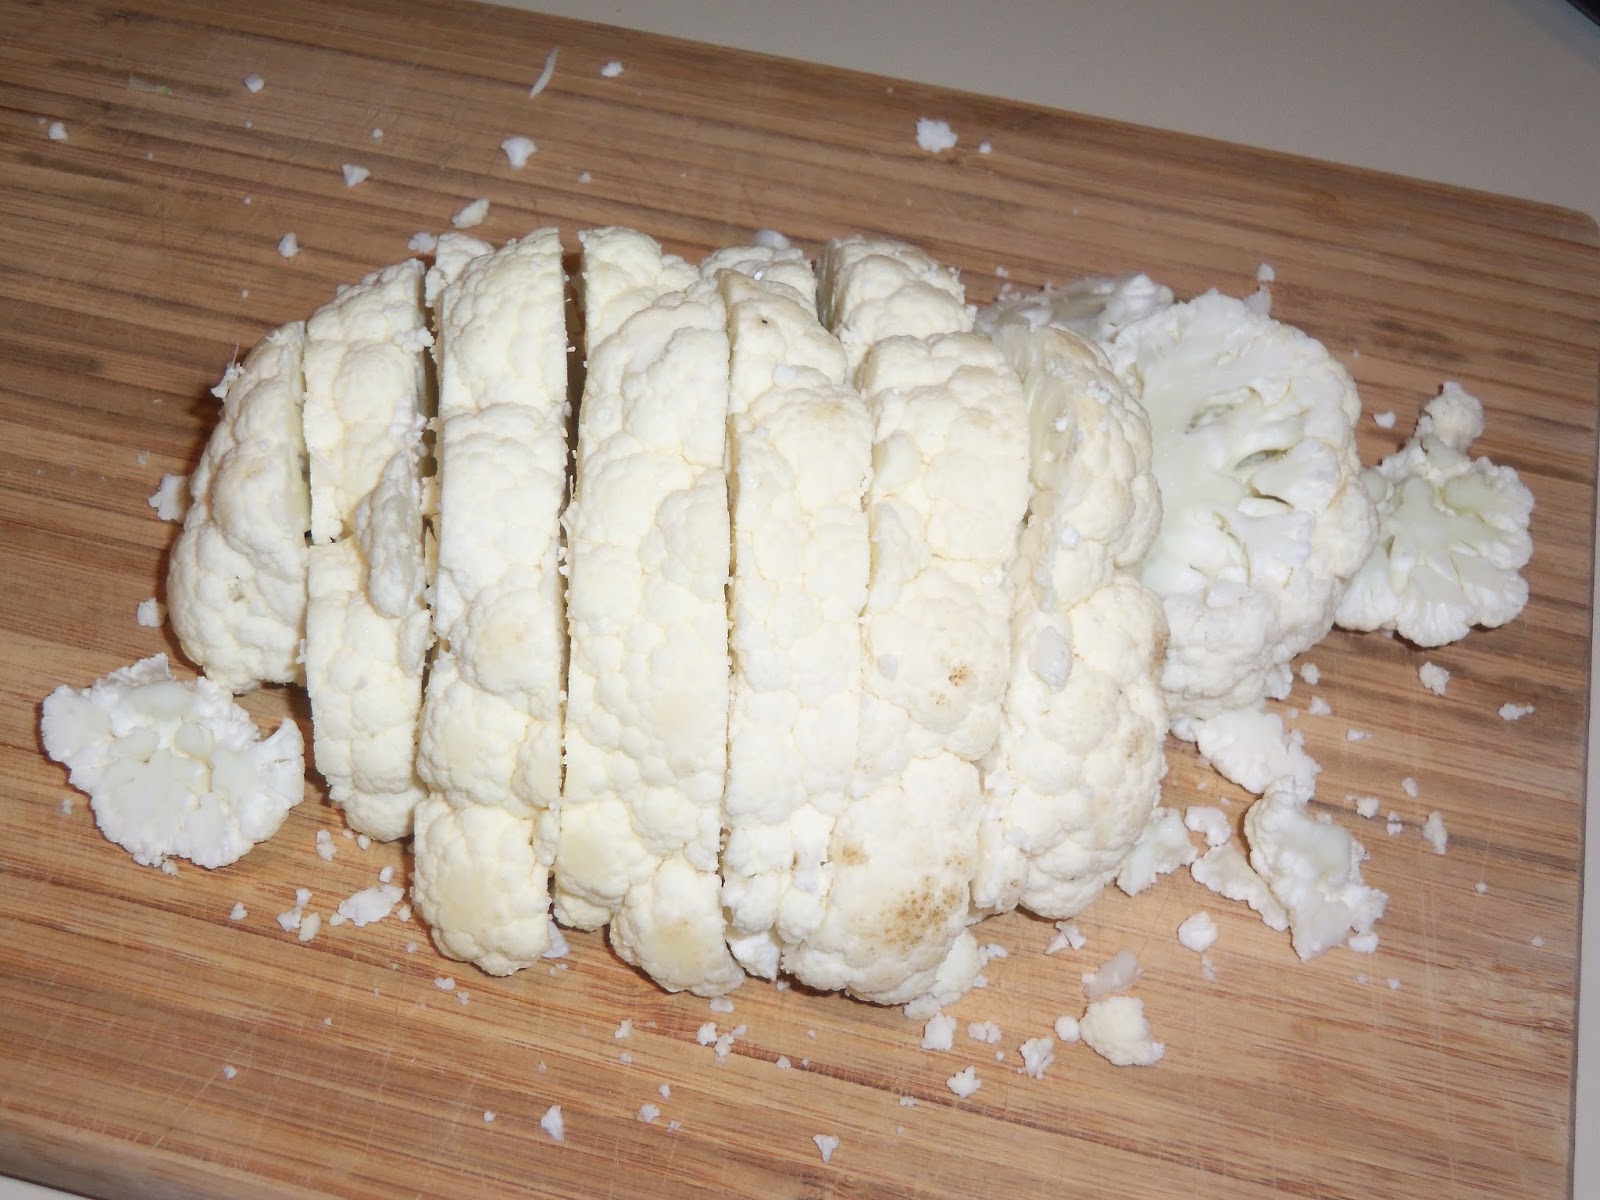
Remove the greens from the cauliflower and cut into 1 inch slices


Arrange on a cookie sheet and sprinkle with olive oil, salt and pepper.  Let roast in a 400 degree oven until it starts to turn brown on the bottom.  Flip each piece and roast again until both sides are browned and can be easily pierced with a fork. 


Add a tsp of butter to a pan and cook the garlic slightly until it starts to turn brown. 


Add the cauliflower and garlic to a bowl and mash until you have your desired consistency.  Add about half of the cheese to the cauliflower and transfer to a pie pan.


Sprinkle the rest of the cheese on top and place back in the oven at 300 degrees until ready to serve.  


I'm not sure what happened to the pictures of me cooking the fish and the spinach.  Add the lemon juice to a plate or pie dish, add the flour to a separate dish and season with salt and pepper.  Dip the tilapia in the lemon juice and sprinkle lightly with salt and pepper.  Next, dip the fish into the flour and coat evenly.  Heat about two tsps of oil in a pan and add the tilapia.  Cook on one side until slightly browned and then flip.  Cook again until the fish easily flakes with a fork. 

Transfer to a plate and heat two more tsps of oil in the pan.  Add a chopped clove of garlic to the oil and brown lightly.  Add a few handfuls of spinach and toss in the oil to coat, once it has wilted add it to a plate and top with a piece of tilapia.  Remove the Faux-Risotto from the oven and spoon onto the plate. 

For extra lemony flavor add a touch of garlic lemon dressing. 
Crush a clove of garlic with a pinch of salt.  Add the juice of one lemon and drizzle over everything!

The Husband and I loved EVERYTHING about this dish!  I hope you do too!

Wednesday, June 19, 2013

Farmers Market Feast - Portabella Mushrooms

Every Sunday the Husband and I got to a local Farmers Market to get fresh produce for the week.  Our favorite is the Hunterdon Land Trust in Flemington. We love the fact that these products are grown locally and we can talk to the farmers to find out about their practices for growing their products.  I know many of you may stay away from Farmers Markets because of the price which is why I wanted to create this post.  I went to the market with $25 in hand, ready to feed 4 people.  The only thing I used from my own kitchen was Salt, Pepper and Olive Oil.  I will say, you could probably make the same meal for less from your neighborhood grocery store, but do you REALLY know what goes into everything you're eating?  How many hands and vehicles it's been through to get to you?  Give your local market a try this weekend.  You may be surprised what you find!

$25 got me:
1 bunch Garlic Scape (the farmer gave me some background before I bought it - it's like "garlic flavored scallions")
3 Tomatoes
1 bunch Basil
1/2 lb Mozzarella
4 Portabella Mushrooms
1 Loaf Cheese Ciabatta bread

I spread 1 Tbsp olive oil on the bottom of a casserole dish and added the mushrooms.  I drizzled another Tbsp of oil on top with some salt and pepper.  I then put everything into the oven at 350 while I prepared the sauce.

I removed the skins on the tomatoes by cutting a X into the bottoms...

Adding them to a pot of boiling water for a few minutes until the skin starts to crack...

And then adding them to ice water to finish the job.

I then peeled the skins off

And cut the cores out where the stem was. 

I added 2 tomatoes, 15 leaves of basil, 1 garlic scape, a slice of cheese (about 2 inches of the end) and salt and pepper to the blender.  I pureed until smooth

I then diced the remaining tomato and squeezed it into the sauce to make it slightly chunky. 


By this time the mushrooms were ready so I pulled them out of the oven.

Added a slice of cheese to each.

And coverd them in sauce. 

I popped everything back in the oven until the cheese melted... I also cut the bread in half and tossed it in the oven for a few minutes to warm up!

I still have a whole bunch of garlic scape and basil left along with half of the bread and about a quarter of the cheese. 

I also had about half of the sauce left over.  It made a great dip for the rest of the bread!


This was a great meal!  For a few extra bucks I would have liked to add some salad greens.  I could have used some of the garlic scape and basil to create a homemade dressing. 

There you have it, a meal for 4 for $25 plus leftovers to use during the week!  If you're worried about not using your produce before it goes bad, I'd share with a friend.  That way you'd both get what you need, for less with no waste!  Farmers Markets are a great place to spend a Saturday or Sunday morning!
There's fun music, great food finds like (local honey and aged cheeses) and great people to talk to.  Bring your dog too, they'll love it!  Ours does!


Wednesday, June 12, 2013

Lemon Basil Salmon Burgers

I'm in the mood for a burger!  The weather has been so gross out lately so on that days that it's actually dry outside I want to stay out there as long as possible.  I decided to make a light refreshing salmon burger with few ingredients and thought that lemon and basil would be the best combo.
Here's what I started out with:

Ingredients:
About 2lbs Salmon
Juice from 1/2 Lemon
1 Egg
2 Cloves Garlic
1/2 Cup chopped Basil


Cube the salmon and add everything to a blender or food processor.  Blend it until everything is uniform.  Don't forget to add salt and pepper!


Once it's finished blending, wrap it in plastic and put it in the fridge until you're ready to grill.


When you're ready to eat, form the salmon into patties and prepare the grill by spraying it with non-stick spray meant for the grill.  Make sure the grill is nice and hot!


Grill the burgers on each side for a few minutes.  Your burgers may be fatter or thinner so make sure to check one inside to make sure they're done.  I ate mine over a simple salad with avocado, but the husband had his on a kaiser roll with mustard.  These were great!  I need to make them again!!